RC Car Object Detector: Take 1
09 January 2021
I haven’t done much with machine learning. The first project I did was teaching an agent to ski gates in a game I created. This result was very underwhelming, but it kinda worked. I’ve decided I wanted to try something in the physical world that was using my own dataset. I chose RC cars because I’ve got access to them, they aren’t boring to use, and I initially thought it would be easy to get plenty of good data from filming them.
tl;wr - Because of the lack of diversity in data (that I should have realized sooner) the object detector ended up being bad this go around. You can checkout the test video on YouTube and view the code on GitHub if you’d like.
How it Works (it doesnt really)
I’m using imageai as a layer on top of tensorflow. Honestly it’s mostly just a copy and paste of their getting started tutorial. I trained the data on the images from 2 video clips. One from a head mounted GoPro, and one from an iPhone. I think I used about 80% of the images for training and the remaining for validation. Yes, this was a huge (should have been obvious) mistake. I realized about halfway through annotating a couple thousand images this was a very wrong approach, so it makes sense that I now have a horrible object detector. It performs OK on the video clips the training data came from… go figure.
At the beginning I was thinking I’d be able to run this model on the official traxxas rustler video and pick up the car, but as I already mentioned the model was not up for it. For all I know it just learned where a car typically is within the track I shot the videos on. I need diverse training data.
Here is the only image NOT from the clips I got a detection from.
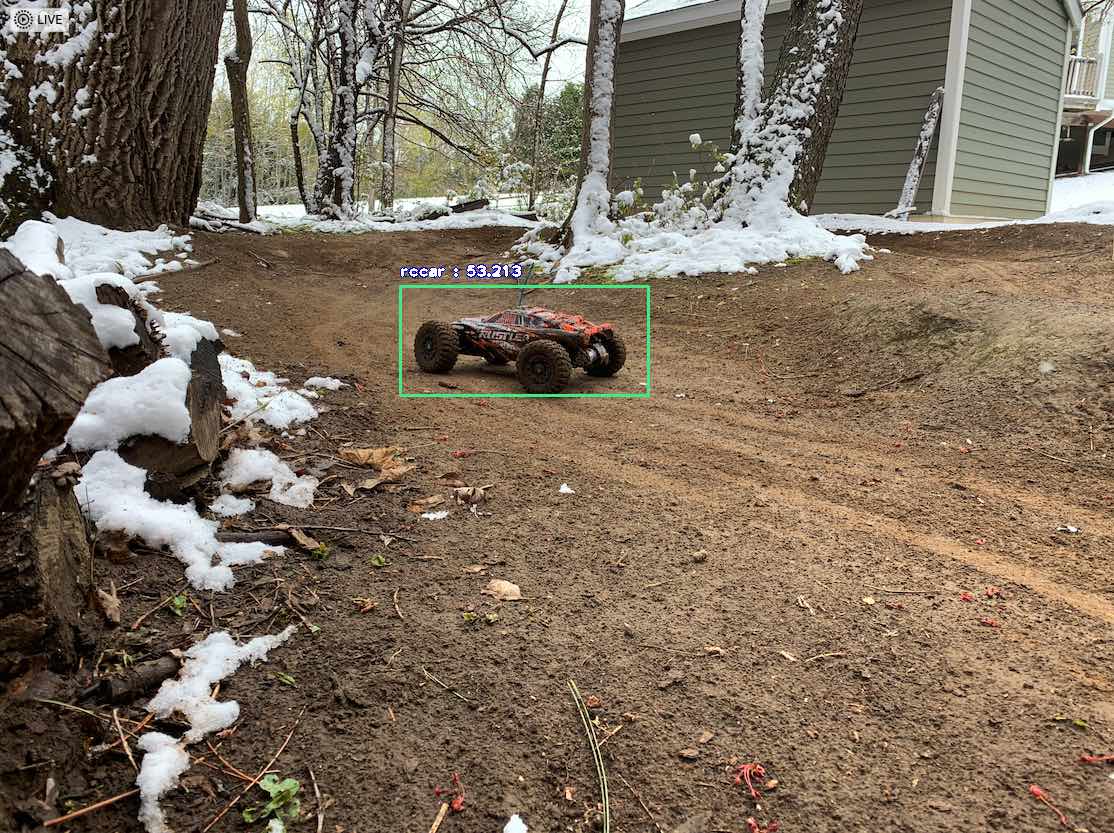
As you can see its from the same track as the training data, just a different time of year. I guess I’d consider this a small win. Maybe.
Annotating Data
I annotated by hand almost 3000 images that I pulled from the 2 video clips. I was looking at a couple annotation solutions, but desided I would build my own, web based, annotator. That way I could pick up any device on the network and annotate data without having to install and build an application.
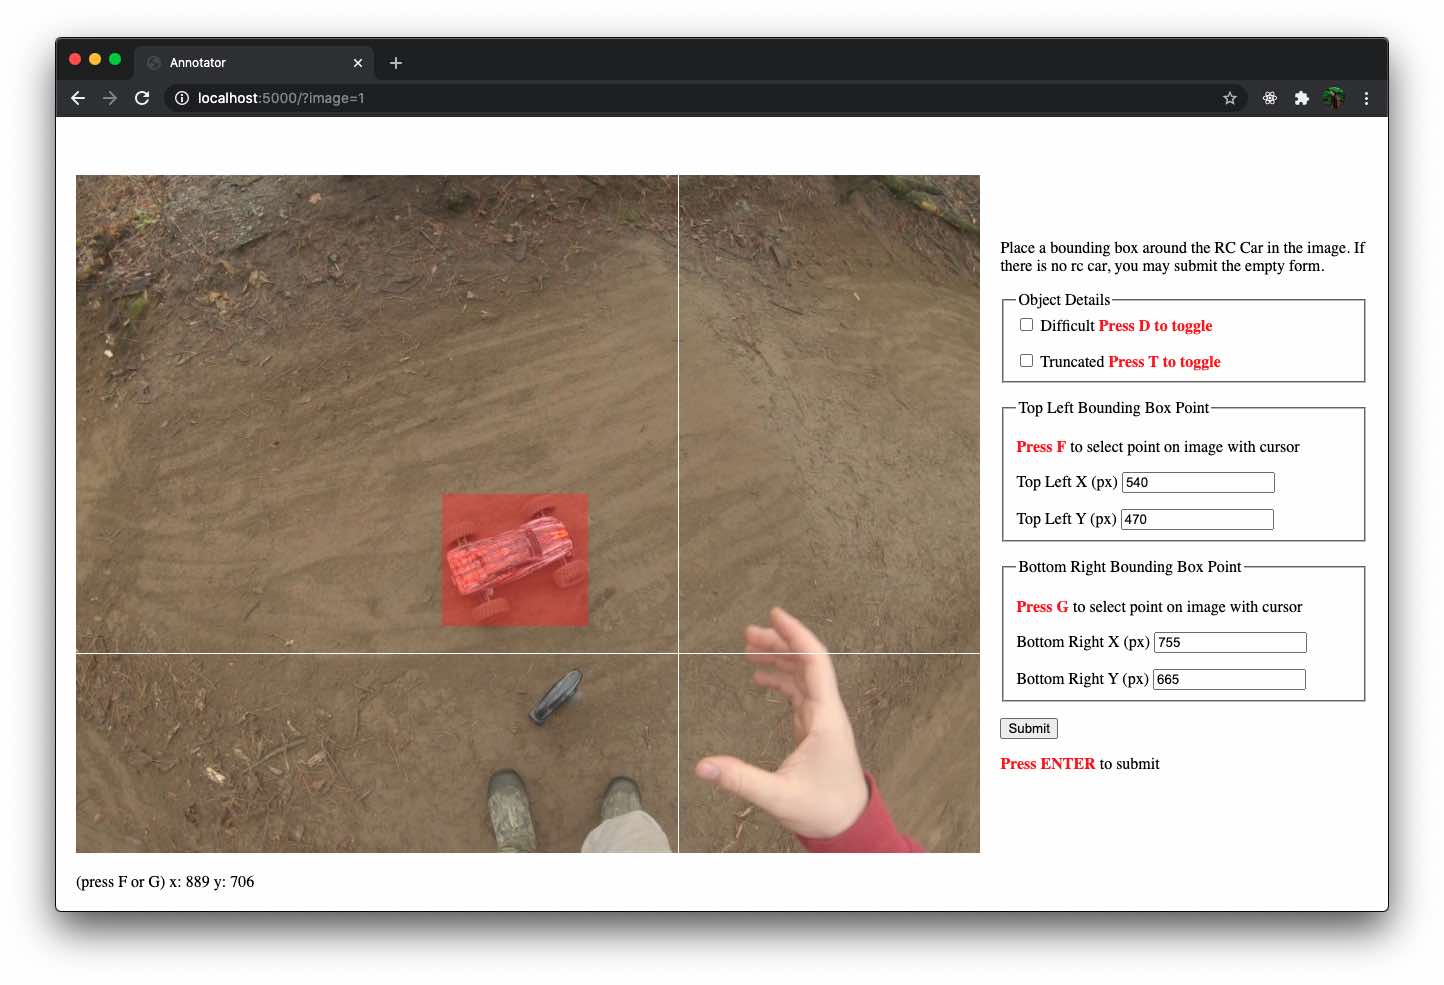
There are quick keyboard shortcuts for click top left, and bottom right corners on the image, as well as mark the image as difficult and/or truncated. This is another reason I build my own annotator, because I could very quickly build in shortcuts for what I thought would make me work quicker. Submitting an annotation saves the data in the Pascal VOC format, and redirects you to another image to annotate.
However, that brings up another part I’m fairly certain was done incorrectly. You’ll see in the annotator screenshot that there is an option to flag a detection as “truncated”. When I started this I understood truncated to mean “cut off” either by the edge of the image or by another object in the image (like a tree).
However, I later realized after questioning myself a couple hours in… that is not the case. I learned from this webpage for an object dectection challenge that there is an addition flag for “occluded” which I should have been using. Truncated for the edge of images, and occluded when an object is hidden behind something. Knowing this - I didn’t adjust my technique because I was already significantly invested in annotating… and I really didn’t want to redo it. Next time.
If you are at all curious to see the code, you can see the code on GitHub.